My Profile - MFA Preferences setup
Multi-Factor Authentication (MFA) adds an extra layer of security to user accounts by requiring more than just a username and password.
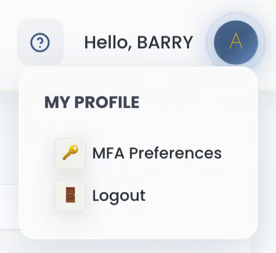
Users can set up their MFA preference, either during the login process or later via the MFA preferences menu available under the My Profile section.
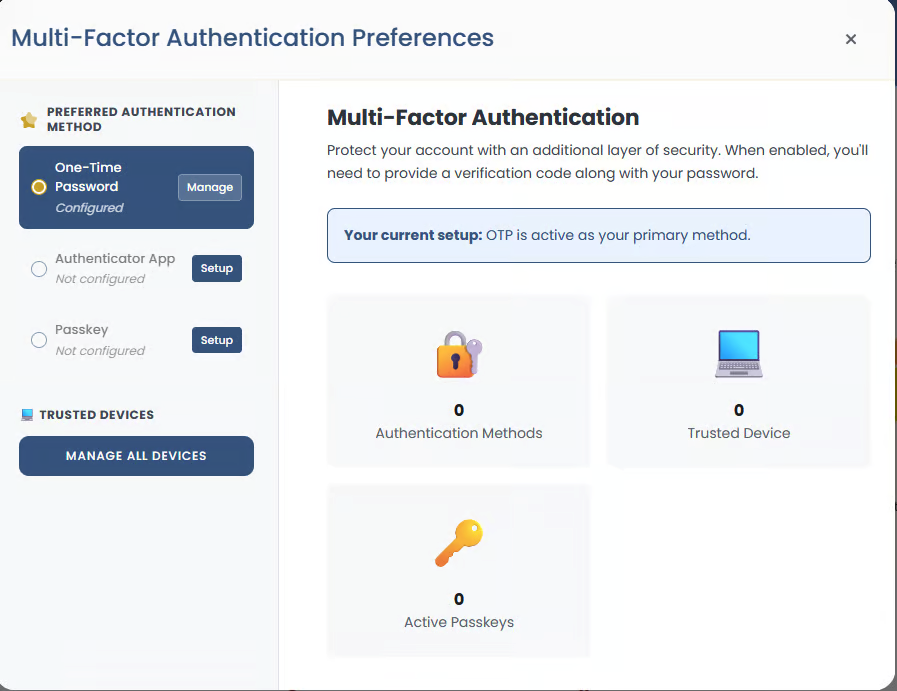
If no MFA preferences are set up, the default option is set to Email OTP - a one-time password is sent to the user's email address. The user then uses this OTP code to complete their login.
When no authentication methods are set up yet, the summary screen shows all options as 0.
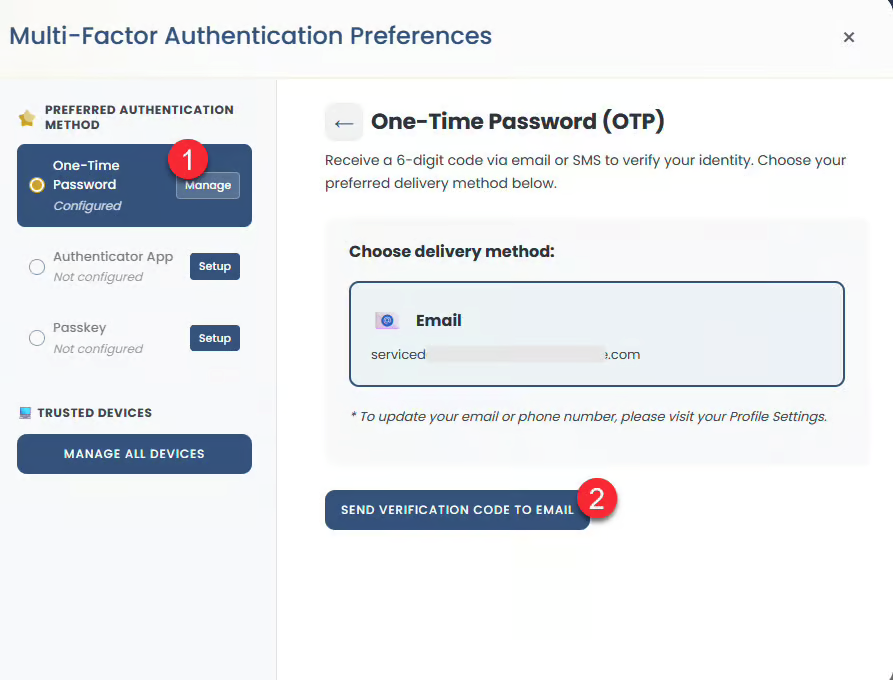
User can test that they receive verification codes by clicking on the Manage button, against the One Time Password option, and then choosing to send a Verification code to Email.
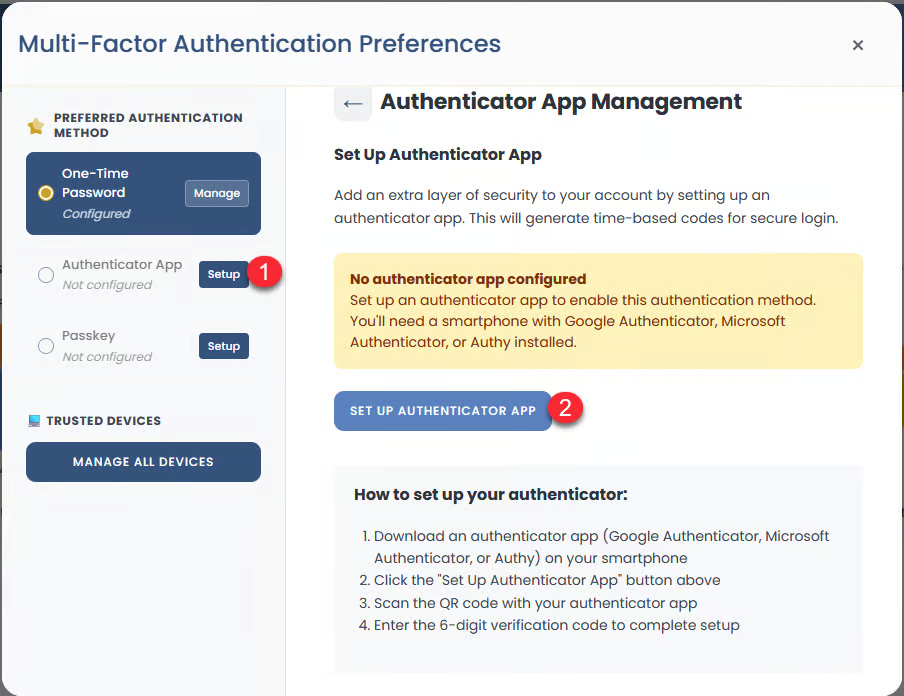
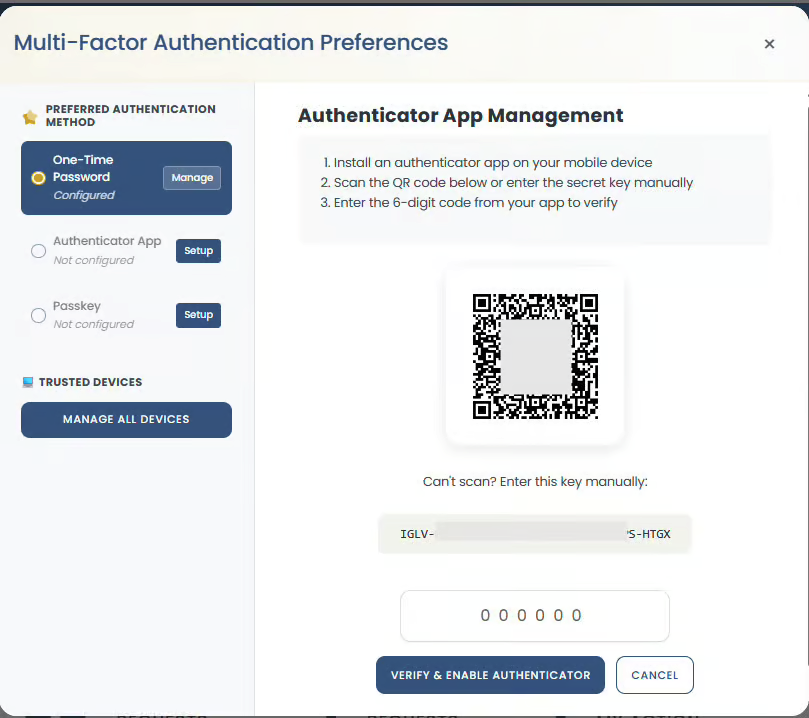
Authenticator app setup - this authentication method is preferred when available, as it works offline and is more secure than OTP since codes are device-generated.
To set up the Authenticator app, follow the steps as per the screenshot below. Steps are also available on the actual setup screen.
Passkey is the strongest form of MFA as it is phishing-resistant and provides a fast user experience.
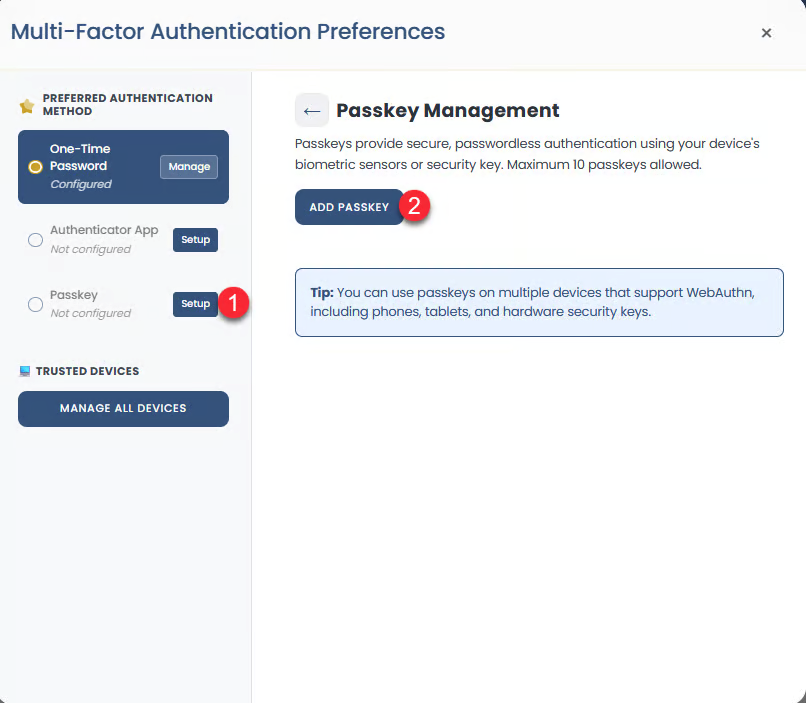
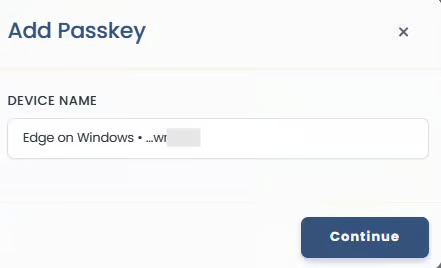
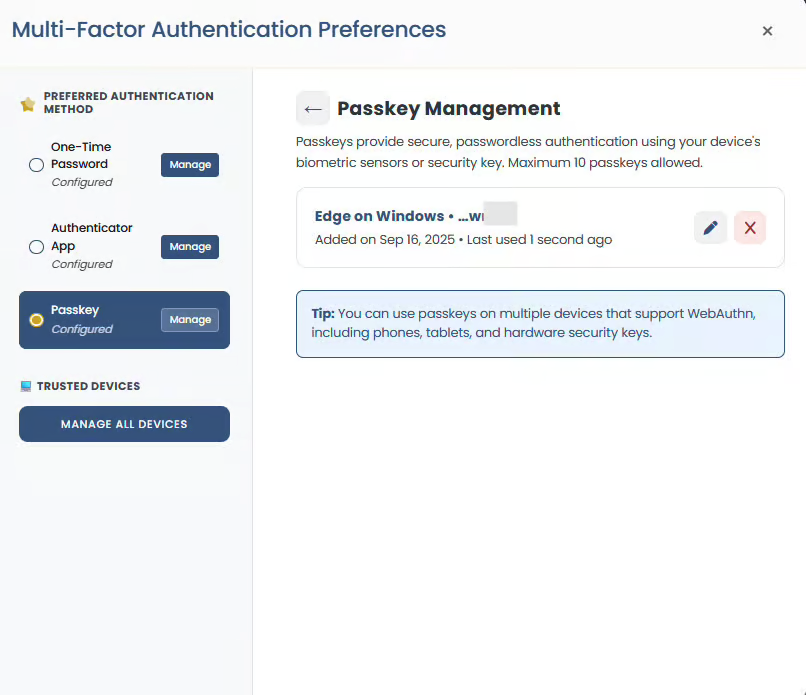
To set up Passkey, click on the Setup button against the Passkey option. Then click on the Add Passkey button. Upon adding a passkey, the user is prompted with the device name and must press Continue to complete the process.
Users can also manage all devices where they have set up a passkey and delete any devices that they are no longer using.
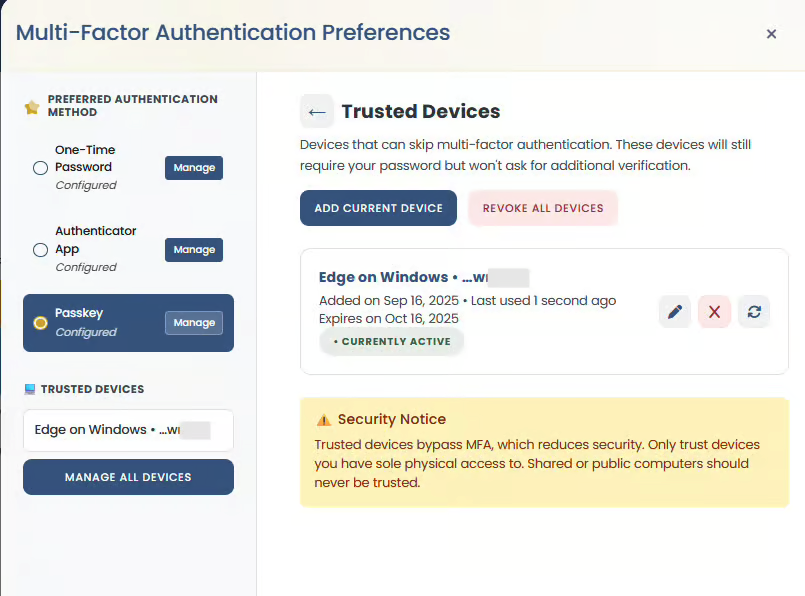
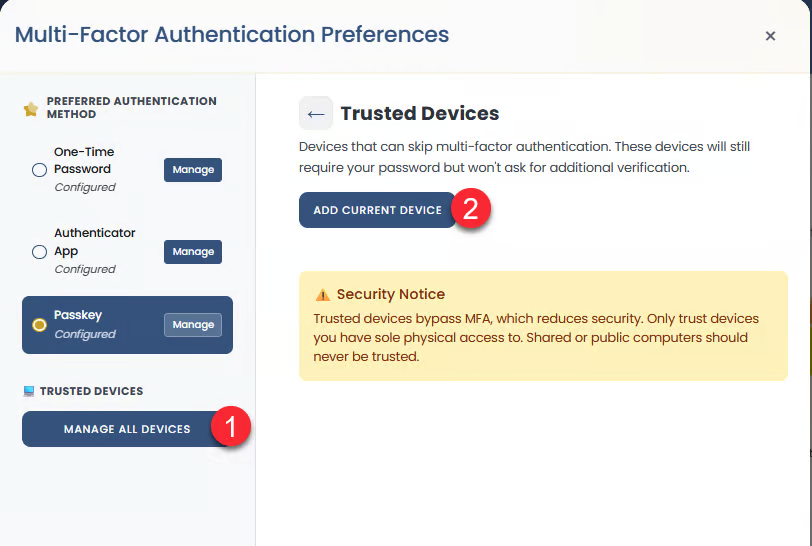
Users can choose to set up a trusted device. Trusted devices skip MFA during the trust period.
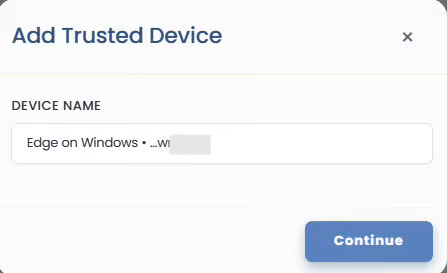
To add a trusted device, the user must click the Manage all devices button and then select to Add Current Device. User will then be prompted with the device name and asked to continue to complete the process of adding a trusted device.
Trust can expire or be revoked manually for security reasons. The user can decide to revoke a single device or all devices.